
In this introduction, we explore the dual benefits of LED step lights - enhancing safety and aesthetics. LED step lights are not just practical solutions for navigating in the dark; they also add a beautiful, modern touch to your staircases. We will discuss how these lights provide clear visibility, reduce the risk of accidents, and elevate the overall look of your space. Additionally, we address common concerns regarding installation, from the complexity of the process to the tools required.
TABLE OF CONTENTS
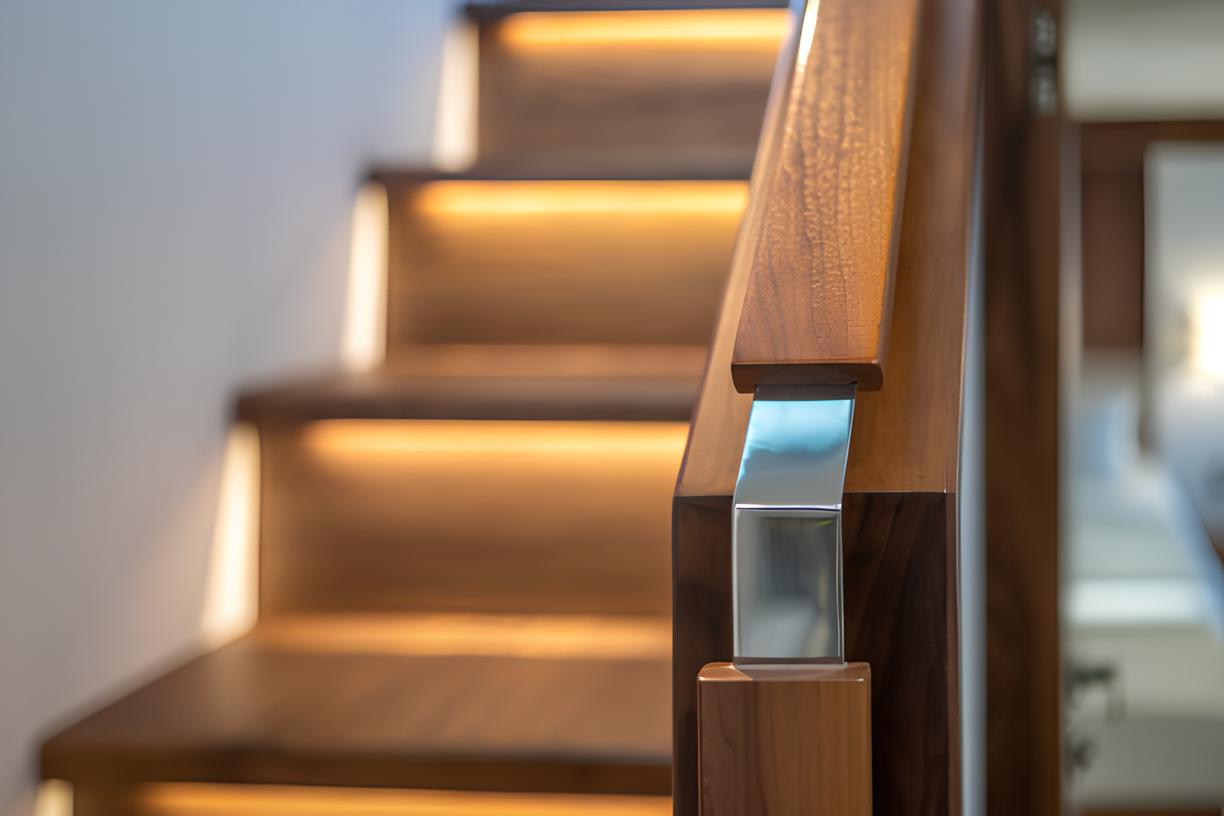
Choosing the Right LED Step Lights
- When choosing LED lights for your steps, consider the style that best suits your space, the brightness level for safety and comfort, and the energy efficiency to minimize electricity costs. Opt for lights that complement your home's design and provide sufficient illumination without being glaring. Energy-efficient LEDs not only reduce your carbon footprint but also lower utility bills.
- LED step lights come in various types, each offering unique features. Recessed lights provide a sleek, integrated look, perfect for modern designs. Surface-mounted lights are easier to install and suit traditional settings. Motion-activated lights offer convenience and energy savings, lighting up only when needed. Solar-powered options are eco-friendly and ideal for areas without easy electrical access.

Tools and Materials Needed
- Essential Tools and Materials: For installing LED step lights, you'll need a range of tools and materials. This includes a drill with masonry bits for concrete steps, wire strippers, electrical tape, screws, and wall plugs. Also, ensure you have the LED step lights and any necessary wiring and connectors. Safety gear like gloves and goggles is a must for protection.
- Alternatives for Different Installations: Depending on the type of LED step lights and your steps' material, alternative tools and materials might be necessary. For example, for wooden steps, wood-specific drills and screws are needed. For solar-powered lights, no wiring is required, simplifying the installation. We provide tailored suggestions for different scenarios to ensure a smooth installation process.

Installation Process
- Step-by-Step Guide: For installing LED step lights, you'll need a range of tools and materials. This includes a drill with masonry bits for concrete steps, wire strippers, electrical tape, screws, and wall plugs. Also, ensure you have the LED step lights and any necessary wiring and connectors. Safety gear like gloves and goggles is a must for protection.
- Positioning, Securing, and Wiring: Correct positioning is crucial for both safety and visual impact. We explain how to determine the best spots for your lights and the appropriate distance between each light. Securing the lights properly ensures they are stable and safe, while wiring them correctly is vital for electrical safety. This section covers how to securely mount the lights and connect the wires, including tips on hiding and protecting the wiring for a neat finish.
Electrical Safety and Precautions
- Importance of Electrical Safety: In this section, we emphasize the critical importance of electrical safety when installing LED step lights. Electrical safety is paramount not only to protect your home from potential hazards like short circuits and electrical fires but also to ensure the safety of those installing and using the lights. We stress the need for careful handling and adherence to safety guidelines throughout the installation process.
- Avoiding Common Electrical Installation Mistakes: To help you avoid common pitfalls, we offer tips and best practices for electrical installations. This includes advice on ensuring all power sources are turned off before beginning the installation, using the right tools for electrical work, double-checking connections, and testing the lights before finalizing the installation. We also highlight the importance of following manufacturer instructions and local electrical codes to ensure a safe and successful installation.

Finishing and Testing
- Proper Finishing and Testing:After installing the LED step lights, it's essential to properly finish and test them. This section guides on finalizing the installation, including securing any loose wires, ensuring all connections are properly insulated, and the installation site is cleaned up. We then detail the process of testing the lights to ensure they function as expected. This includes checking for consistent illumination, proper activation of any sensors, and ensuring there are no electrical issues.
- Troubleshooting Common Issues:Even with careful installation, issues may arise. This part provides troubleshooting tips for common problems such as flickering lights, non-functioning lights, or sensor issues. We offer practical solutions like checking connections, ensuring proper voltage, and replacing faulty components. This guidance aims to empower readers to resolve minor issues quickly and safely.
Conclusion
In our conclusion, we encourage readers to undertake the project of installing LED step lights. We emphasize that while the task may seem daunting at first, the benefits far outweigh the initial effort. LED step lights not only enhance the safety and beauty of your steps but also offer long-term advantages like energy efficiency, lower electricity costs, and minimal maintenance. By embarking on this DIY project, you not only improve the aesthetics and functionality of your home but also contribute to a more sustainable lifestyle. We hope this guide inspires you to transform your steps with the functional elegance of LED lighting.
Share:
How Long Do Smart Light Bulbs Last: The Truth and Best Practices
Is Track Lighting Outdated? Exploring Modern Lighting Solutions